People without a BLAZE account can also send you files by using an Upload Portal.
* Note: This feature is for paid plans. Please upgrade to use it.
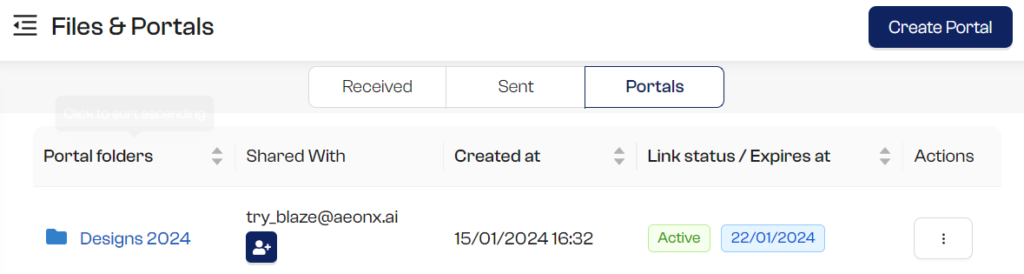
1. Upload Portal
Go to Files & Portals page, where you’ll find the ‘Create Portal’ button on the right. Click this button to create an upload portal.
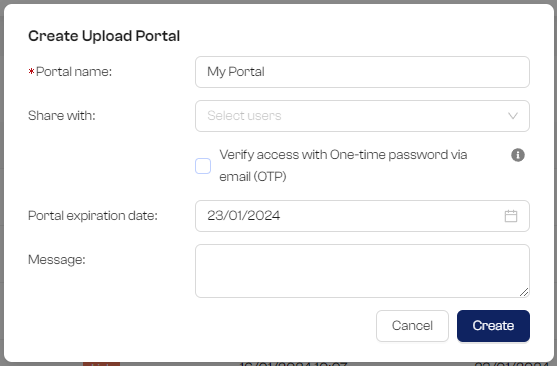
2. Create an Upload Portal
Fill in the necessary details to create an Upload Portal:
- Portal Name: Enter the desired name for the portal, which will be shared with your colleagues and clients.
- Share With: Specify workspace members you want to share the uploaded files with.
- OTP (One-time Password): For added security, consider using a One-time Password (OTP), available with the Pro subscription plan. Learn more here.
- Expiration Date: Set the portal’s expiration date.
- Message: Optionally, include a message for the recipient.
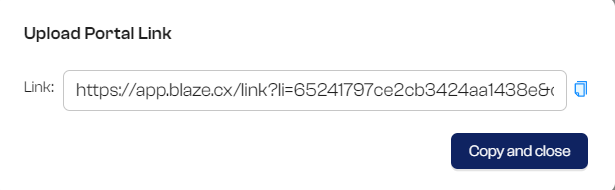
3. Share the link to Upload Portal
This link grants access to the Upload Portal. Please share it with individuals who can use it to send files to you.
4. Access the Files
When someone sends you files through the Upload Portal, you’ll receive email notification and a notification bell alert in BLAZE. To access these files, go to the ‘Files & Portals’ page and select the ‘Portals’ tab. Here, you’ll find all the portal folders you’ve created, and all packages sent through your Upload Portal will be saved in their respective folders.
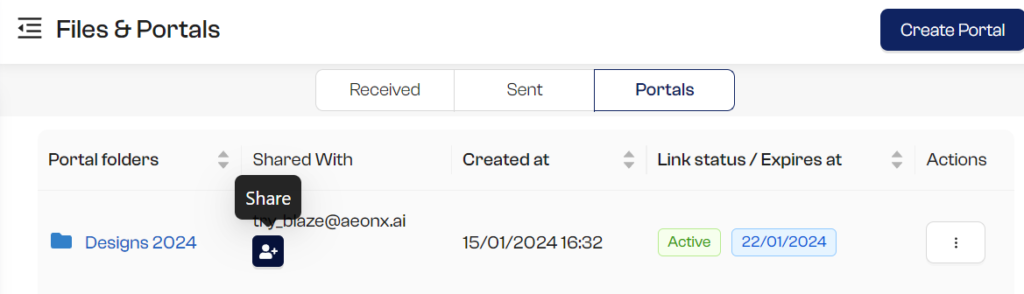
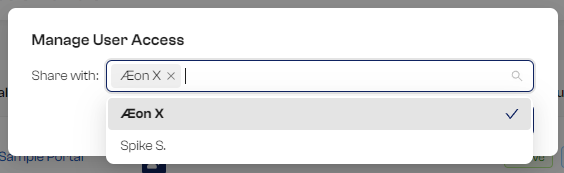
If you need to add or remove team members’ access to the portal folder, follow these steps:
- Click on the ‘+’ button under ‘Shared with.’
- Select the desired team member.
- Click ‘Save.’
- The selected member will now have access to the files using the same portal.
5. Downloading the files
Click on the portal folder where you received the package. You will see the complete details of the packages received under this folder. Click on the download icon to download the file.

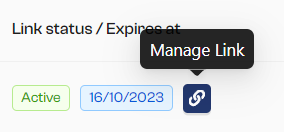
6. Manage Expiration
The Upload Portal will automatically expire on the date set when it was created. You have the option to update the expiration date; however, the maximum retention period depends on your subscription plan. For further details, please refer to the pricing page.
1. Click on the “Manage Link” button.
2. Edit the expiration date and click on Save.
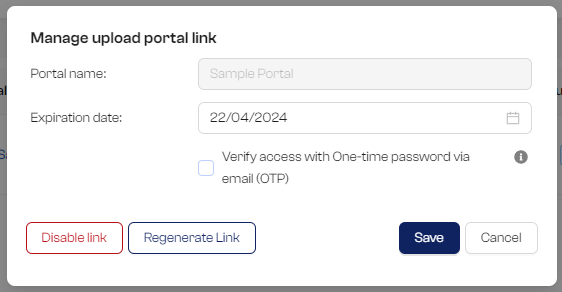
Note: If you no longer wish to receive packages through the Upload Portal, you have the option to disable the link as well.
Note: For added security in your Upload Portal, you can set a One-time Password (OTP), which is available with the Pro subscription plan.
